
Advantages of a tiller tamer
If you are sailing short handed or solo, a tiller tamer of some sort is essential. With a properly set up tiller tamer and a correctly balanced sail plan, a boat can sail to windward by itself out in the open sea for long enough to have a drink, eat a snack or just admire the scenery. Subject to certain conditions, it will also allow you to leave the tiller to make adjustments up forward. Just don’t expect the boat to hold a completely steady course – as the wind shifts, so will the boat’s heading. And as the wind increases or drops, the boat will luff up or bear away, respectively. But on average, it should move in the required direction, more or less.
Commercially available tiller tamers
There are several different makes of tiller tamer commercially available. They all rely on two common elements:
- A line running from one gunwale to the other across the tiller
- A device attached to the tiller which clamps on that line, thus fixing the required position of the tiller relative to the the gunwales, whether amidships, hard-a-lee (for heaving to) or any other useful position. It must be capable of being unclamped quickly.
The better devices have two other elements:
- A line tautness adjuster to help the tiller tamer compensate for different wind strengths (stronger winds need a tauter line)
- Some sort of shock absorber on one or both sides of the line, to partially absorb the effects of wave action against the boat
It ought also be possible to have the tiller partially tamed, so that its position can be altered against a certain amount of resistance from the tamer. This sort of adjustment is useful when trying to set up a balanced course which will allow the tiller to stay untended for some time.
Home-made tiller tamer
The best and most satisfying tiller tamer (but not necessarily the cheapest) is a home-made one, which combines the best functions of all the commercially available versions. It is less prone to line chafe and when bits fail, which they inevitably do over time, it is very easy to mend. The idea comes from a number of different sources, including several contributors to the SB forum.
You will need the following:
- Around 3m of 4mm line
- Around 1m of 3mm line
- Two small stainless lacing eyes
- Two small stainless snap hooks
- A 20mm cheek block
- A lightweight V cleat for the 3mm line
- A small diameter stainless ring
- A heavy duty guy rope adjuster of the kind used on big tents
- Two 12″ lengths of heavy duty 3/8″ surgical tubing
- One 12″ length of lighter weight 1/8″ surgical tubing
- Two 6″ lengths of opaque hose to cover and protect the heavy duty surgical tubing from UV damage (optional)
- Some whipping line
To assemble:
- Double a length of heavy duty surgical tubing through the rear of one of the stern horn cleats and seize/whip the ends together, so that it is permanently looped in place. When doubled, it should be about 6″ long when relaxed, much more when under tension. Repeat on the other side.
- Take the two lengths of opaque hose and slip one over each of the lengths of doubled-over surgical tubing, with the seized ends of the latter facing outboard (optional but recommended for places that actually see sunshine)
- Attach a snap hook to each of the lengths of surgical tubing on their looped inboard ends
- Take one end of the 4mm line and attach it to one of the snap hooks with a bowline
- Bring the other end of the 4mm line across the cockpit, under the tiller, and loop it through the other snap hook on the other side, fastening it in place with the guy rope adjuster
- Screw a lacing eye horizontally across the underside of the tiller, about a third to half way back from the forward end
- Screw a second lacing eye about 6″ aft of the first eye, facing fore and aft underneath the tiller
- Screw the cheek block to the underside of the tiller just aft of that, so that the block’s sheave projects just beyond the port underside of the tiller
- Screw the V-cleat to the port side of the tiller, close to the first lacing eye
- Attach the 3mm line to the second lacing eye, thread it forward through the first lacing eye, around the front of the 4mm line (which is across and just forward of the first lacing eye), back aft through the first lacing eye and then back to the cheek block, exiting it to port. Then thread it through the ring (of which more later) and forward to the port side V-cleat, terminating it in a figure of eight knot. So when that end of the 3mm line is pulled hard forwards and is jammed into the V-cleat, the 3mm loop around the 4mm line pulls the latter against or even aft through the first lacing eye. The tension on the 4mm line and the friction against the edge of the lacing eye fixes the tiller in the required position relative to the gunwales. The tighter the 3mm line, the more firmly the tiller is fixed in position. It is possible to adjust the 3mm line so that there is just a little friction of the 4mm line against the first lacing eye, allowing for fine tuning of the tiller position
- Attach the lightweight 1/8″ surgical tubing to the top of the ring on the port side, then over the top of the tiller and tie the other end of the tubing, under a bit of tension, to the aft lacing eye under the tiller. So when tension on the 3mm line is released from the V cleat (thus releasing the tiller), the ring on the light weight surgical tubing pulls the 3mm line upwards, stopping the latter from unseating itself in the cheek block and preventing possible jams
- Finally, adjust the overall tension of the 4mm line using the guy rope adjuster and trim off any excess line.
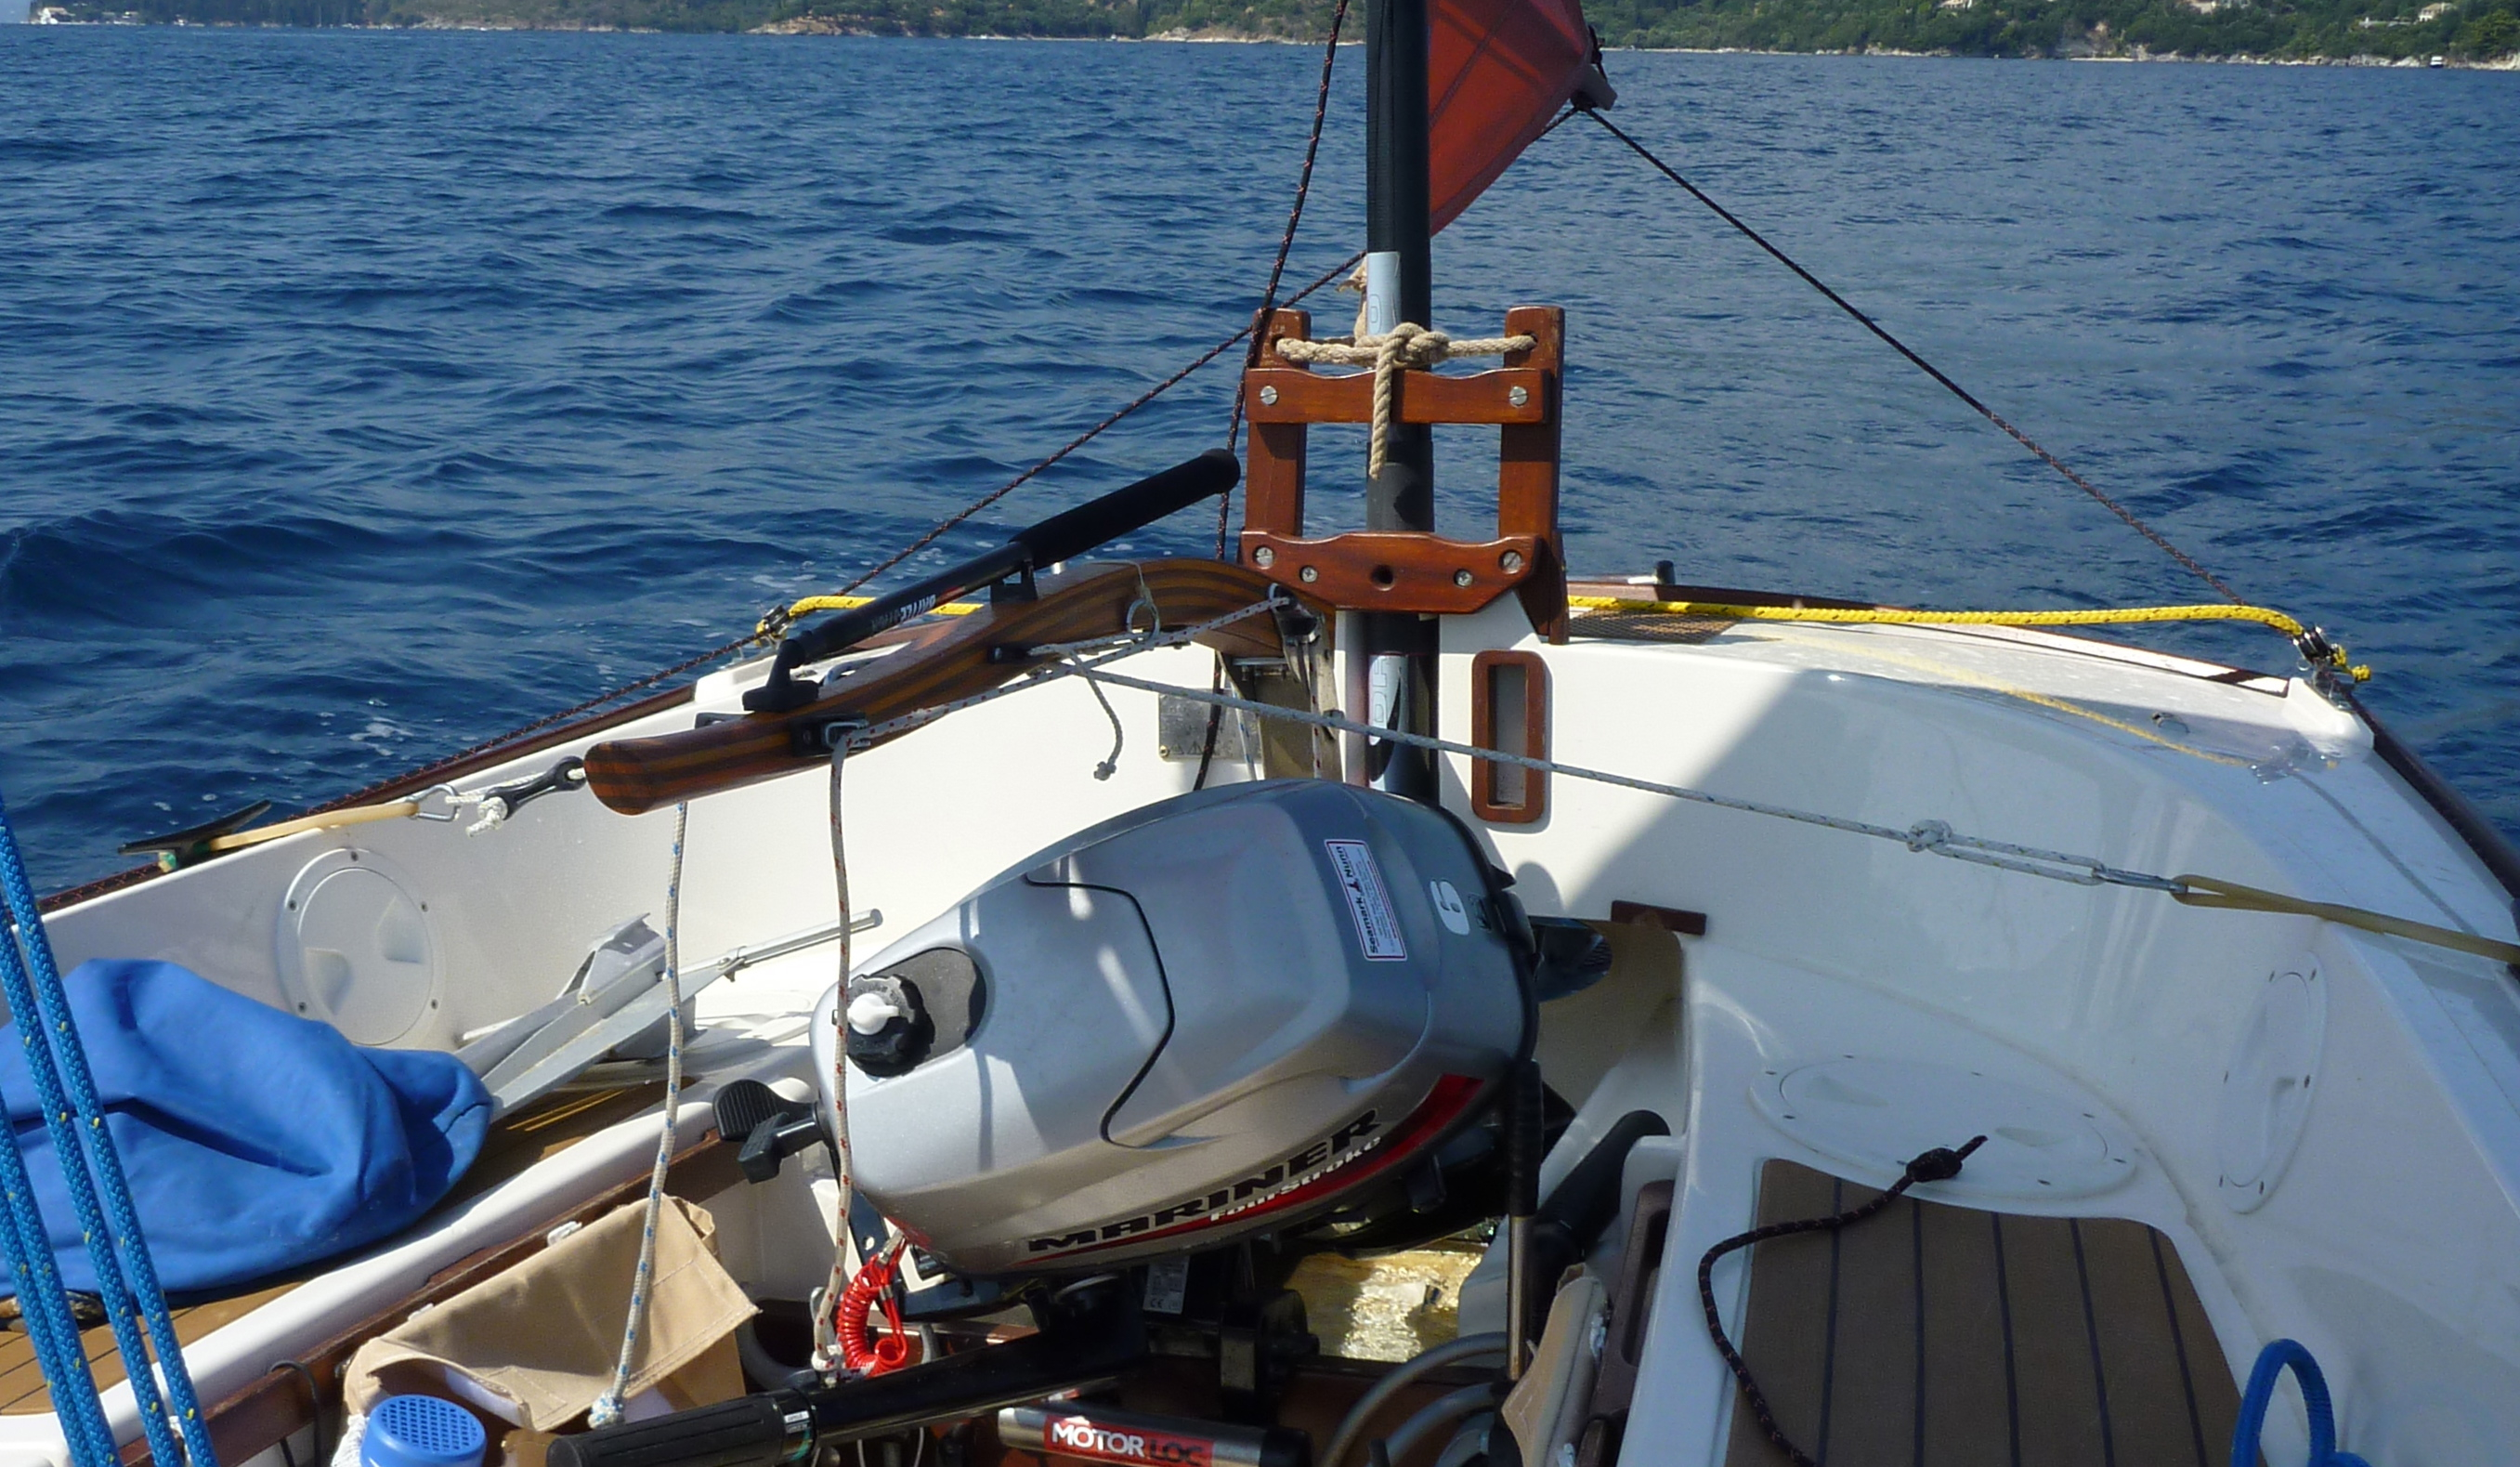
A home-made tiller tamer in action, showing most of the elements described above. Positioning the tiller tamer line and hardware so that it does not interfere with the rudder uphaul and downhaul requires a bit of judgement.
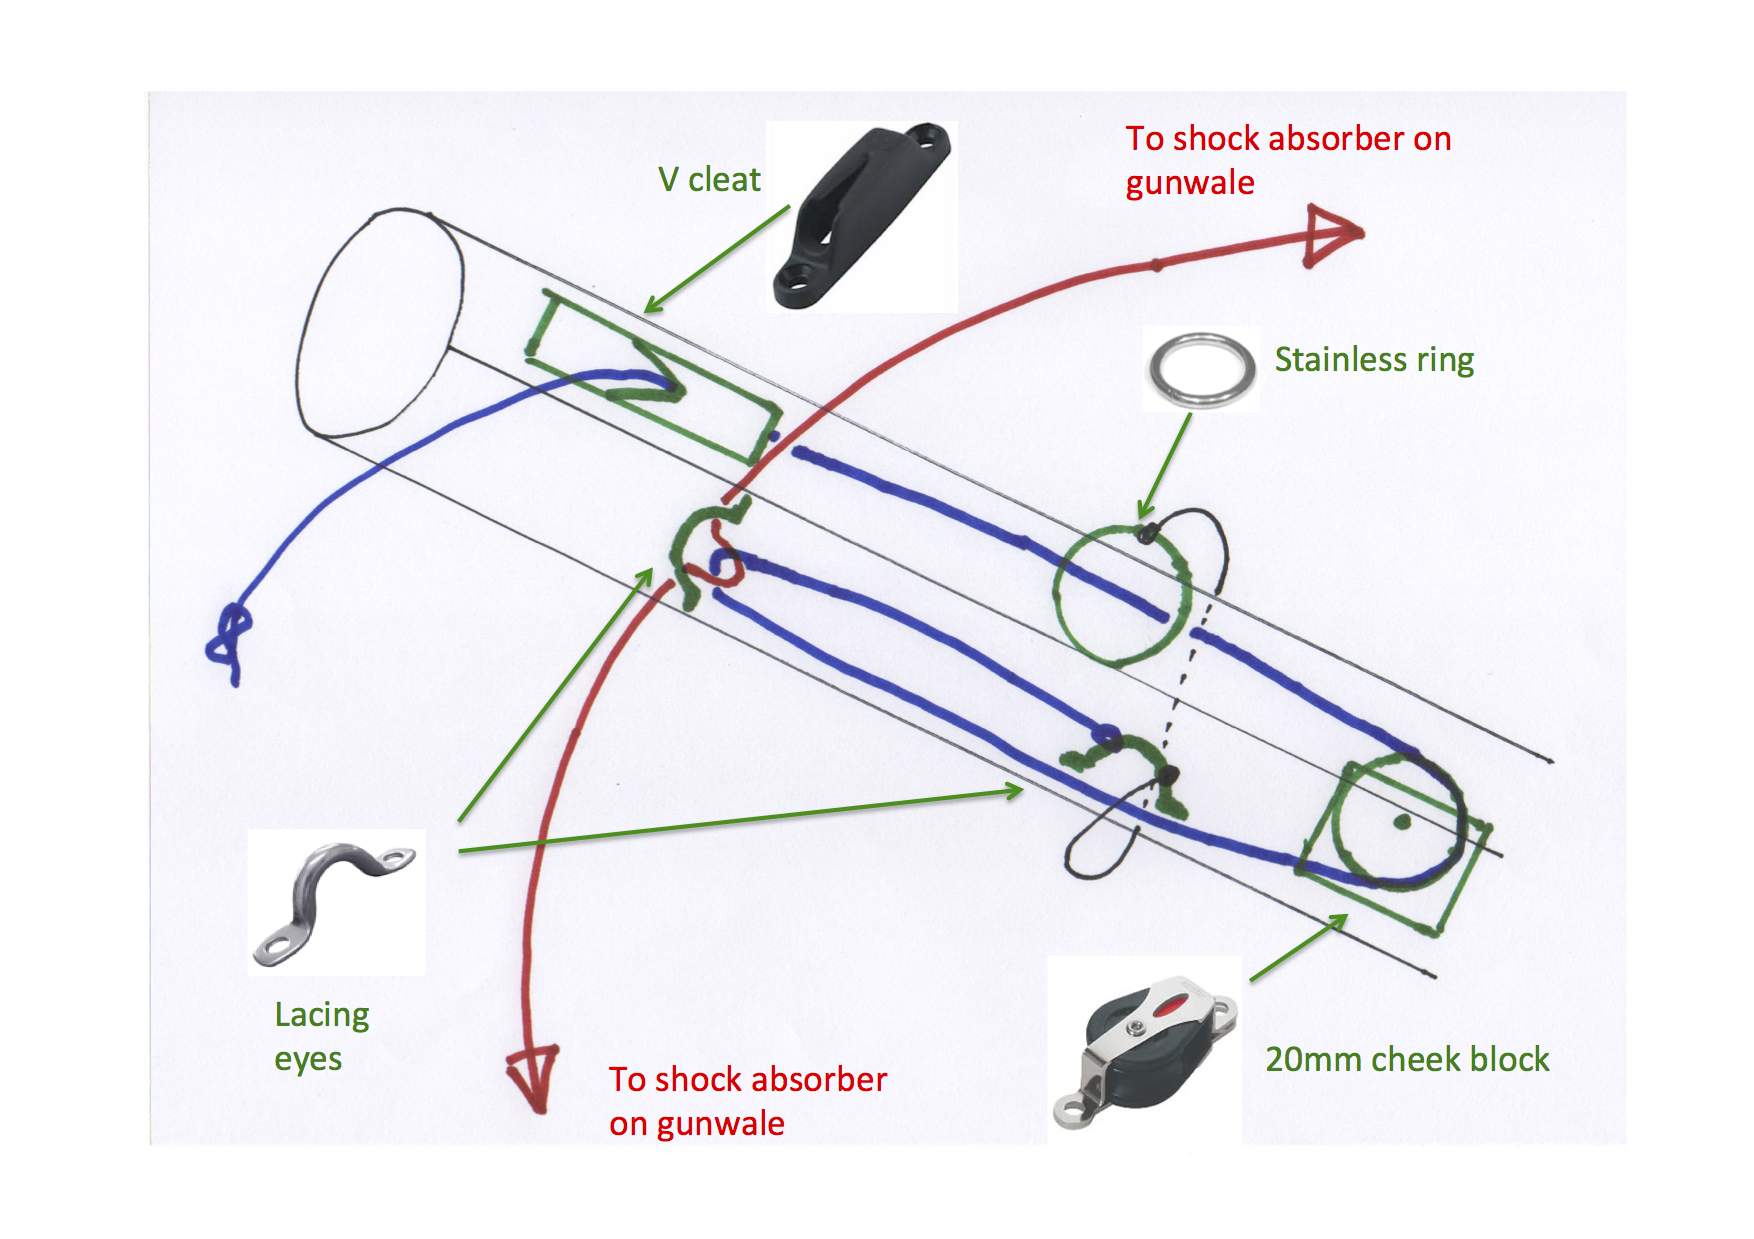
A schematic diagram of the underside and port side of the tiller. Green = hardware; red = 4mm line; blue = 3mm line; black (attached to the stainless ring) = 1/8″ surgical tubing.
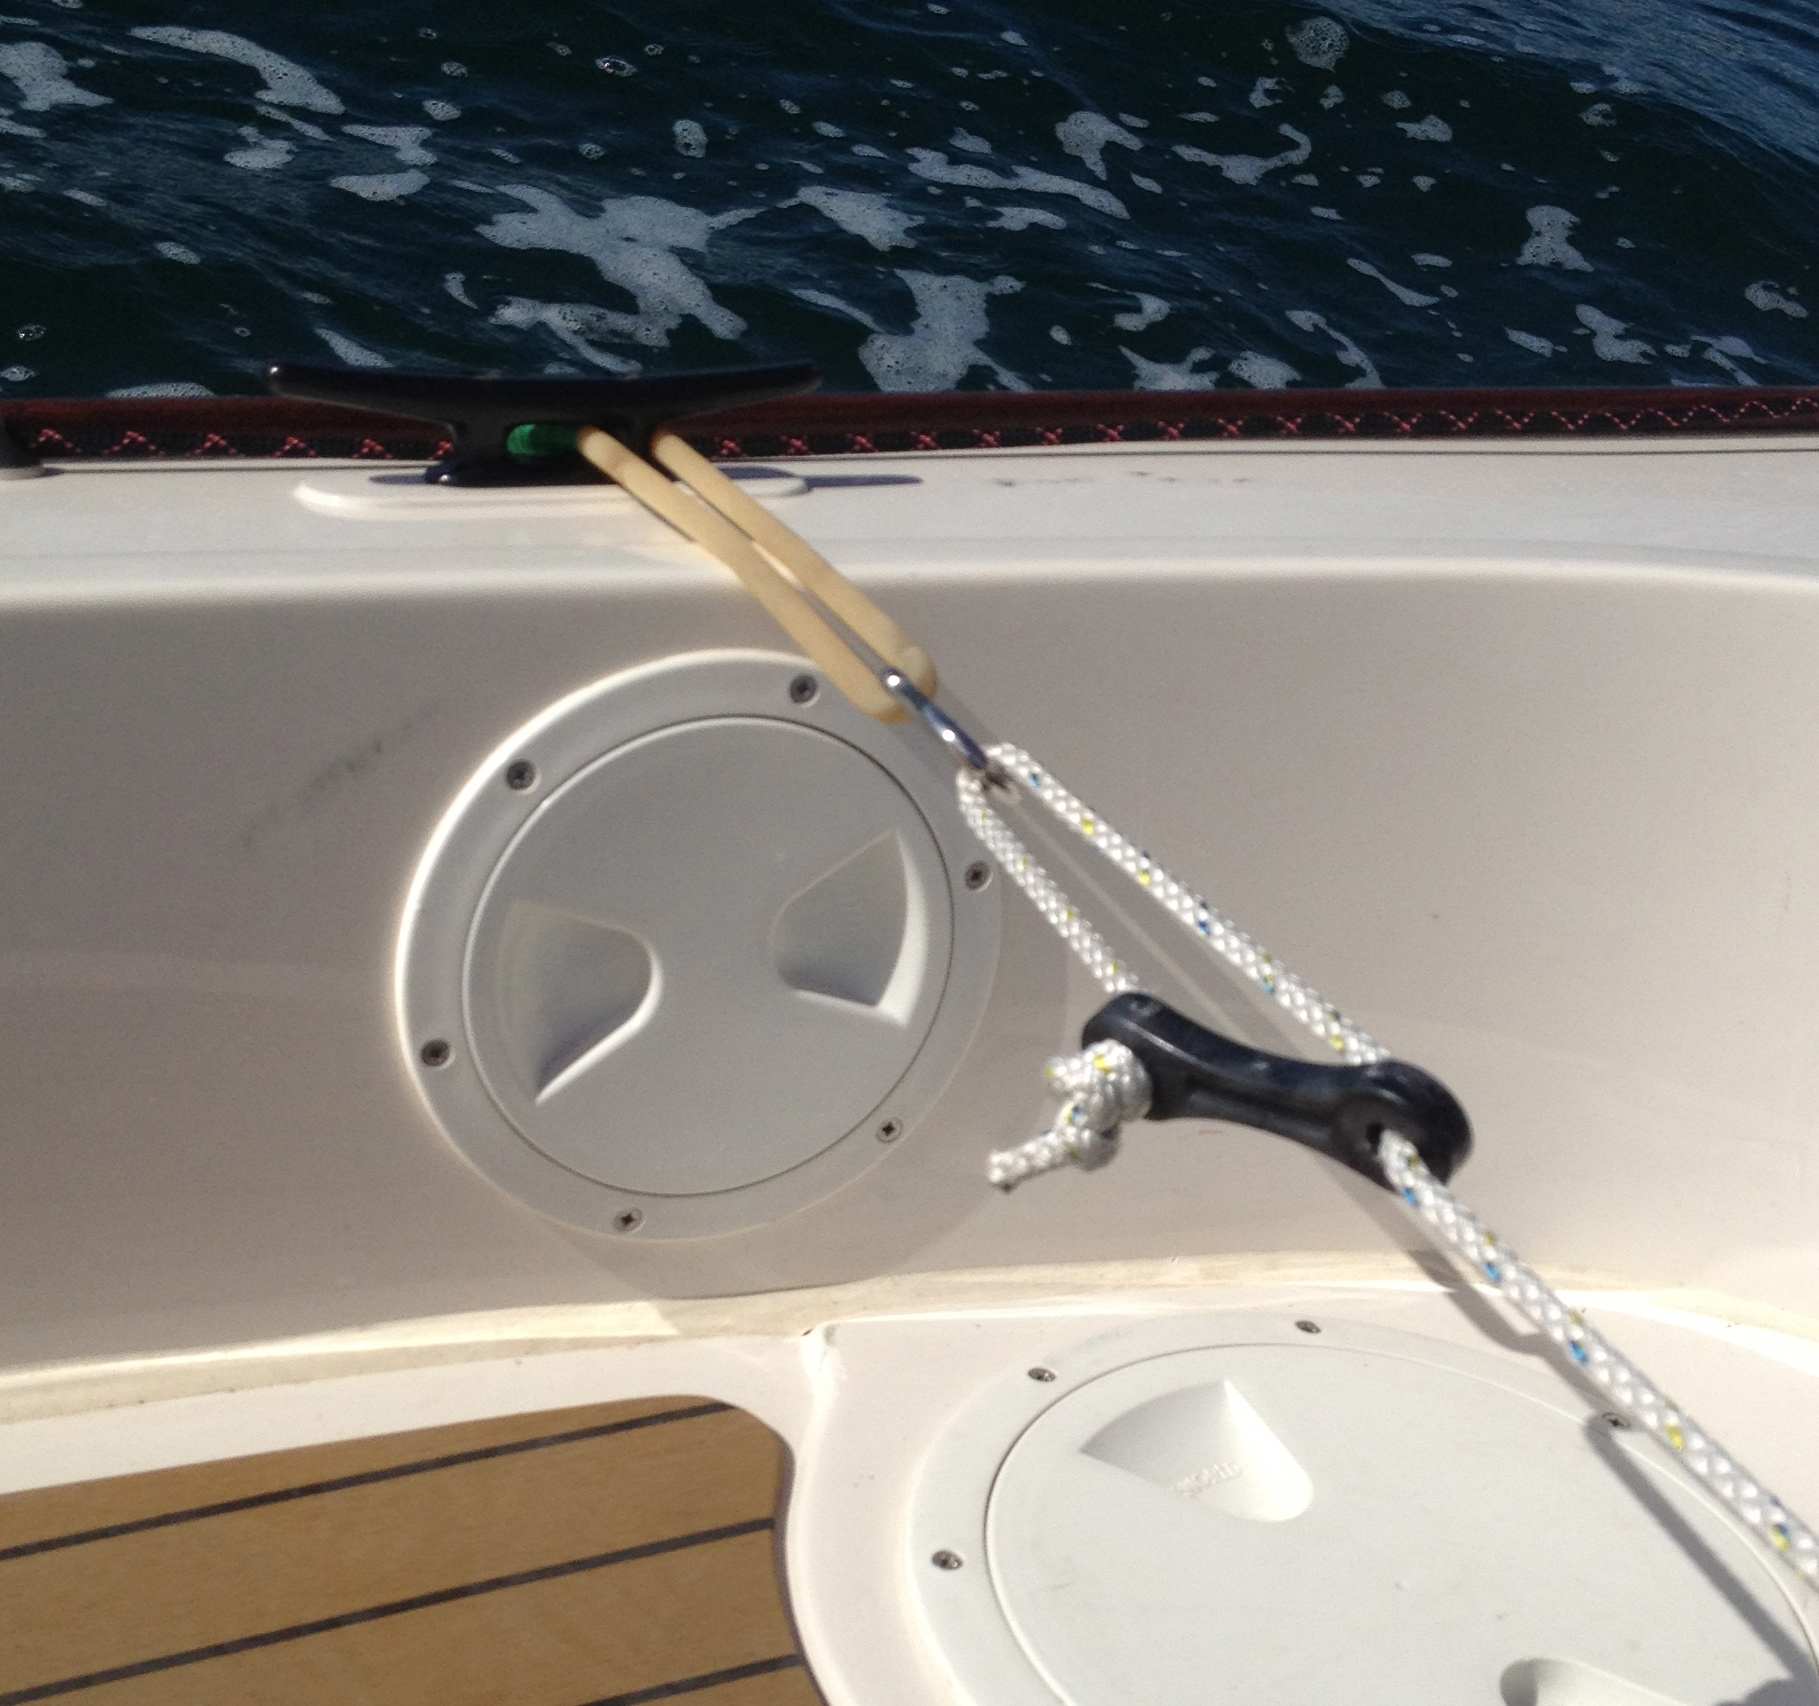
The surgical tubing shock absorber attached to the aft starboard horn cleat and through the snap hook to the 4mm line, the tautness of which can be adjusted with the guy rope adjuster
Tiller tamers in use
Probably the most frequent use of the tamer, whether shop-bought or home-made, will be to fix the tiller securely amidships. This could be when you are at anchor, when weathercocking into the wind (with or without the anchor out) with just the mizzen set or when motoring slowly into the wind with the mizzen set. Also when moored or on the trailer with the rudder raised.
The next most frequent use (and the most interesting) is fixing the tiller very slightly to leeward when on a long tack to windward. In an F3 and using mizzen trim to make final adjustments, the course steered should vary between 38 and 50 degrees apparent to the wind, depending on the wind’s strength. The harder the wind, the closer to windward you will sail. In theory, the boat could steer itself for hours like this in light winds. If you are using a version with shock absorption, the tiller will twitch through the waves as if it is being controlled by an electronic tiller pilot.
You may notice that the boat luffs up when you alter weight distribution by moving forward. If you are trying to make sail adjustments up forward and want to steer a steady course at the same time, this can be counteracted by pulling up the centreboard by around 75%. Don’t forget to drop it again when you have finished your adjustments.
The tiller can also be fixed hard-a-lee for when heaving to. In fact, that is the easy part of heaving to – the difficult part is making the boat stop in the water by adjusting the sails.
Safety
If you use the tiller tamer to fix a course when sailing solo and then fall overboard, the boat will sail serenely on without you. Without the tiller tamer, it would tend to luff up and stop more or less dead in the water, allowing you some chance of climbing back on board.
So the first rule when sailing solo with a tiller tamer must be “no heroics”. Don’t clamber all over the foredeck with the tamer locked on unless you are wearing a life jacket and are hooked on with a harness. Take everything more slowly and carefully than you normally would. Additional convenience at the cost of significant extra risk is probably not a very good bargain. Remember that a lot of sail adjustments can also be made when hove to (if you can get it to work) or when weathercocking into the wind. This means that in theory the boat ought not to move away from you as quickly if you are unfortunate enough to fall overboard.
Graham W November ’12
A very simple tiller tamer
Just to add to Graham’s excellent work. I have used a much simpler tiller tamer for three years, based on an idea from the Drascombe Association. The photo below just about shows it.
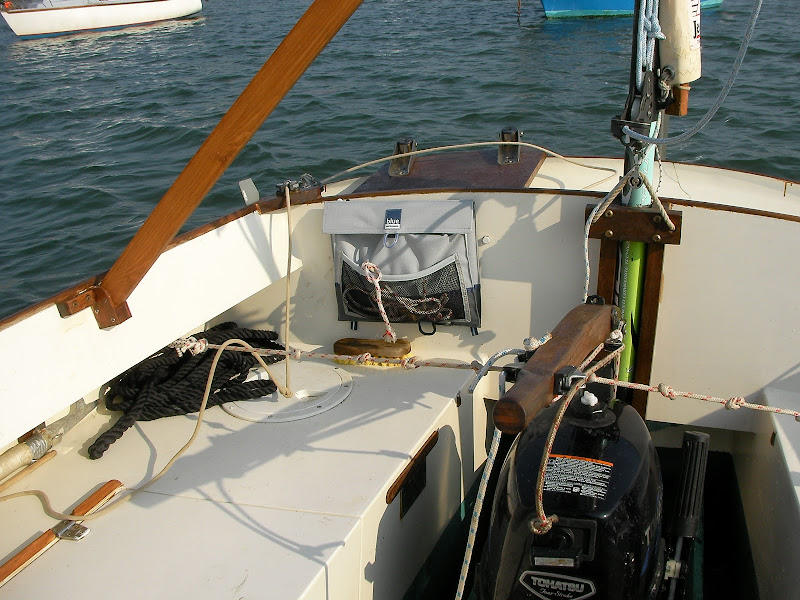
Tiller tamer knotted line in use underneath the tiller
The tamer consists of single line running across the cockpit, underneath the tiller. The line has a number of closely spaced figure of eight knots, with two very close together at the centre of the line. Each end of the line finishes in a stainless steel hook which hooks onto a loop of shock cord under each side deck. Underneath the tiller there is a simple nylon horned cleat. That’s it. It takes a bit of setting up to get the length of line, the spacing of the knots and the position of the cleat right. The cleat needs to be far enough forward of the shock cord loops so that they will be pulled quite tight when the line is in use.
To use it, the tiller is pushed to the desired position, the knotted line is pulled forward and hooked up over the front of the cleat under the tiller, and the knots then stop the tiller moving. To disengage it, you just pull the line forward off the cleat and drop it, to hang loose below the tiller. You can remove the whole line simply by unhooking it. You need those two, closely spaced central knots to hold the tiller in the middle. I have sailed close hauled for nearly half an hour without touching the tiller. I use it all the time just to hold it for a moment whilst I pour a coffee or just sit back to enjoy the view. If I heave to, which I do a lot, I just shove the tiller down wind and snap on the line to hold it there. The Video below shows it working whilst I am filming. All of the filming was done with the tiller held by the knotted rope, as you can just see briefly near the middle:
Julian Swindell (Daisy Grace) Dec 2012
Postscipt
Since writing this article and after Julian’s contribution above, I found an internet survey of every possible tiller tamer under the sun – all except Julian’s version, which deserves to be included. http://www.petersmall.co.uk/site/RIG%20TILLER%20LINES.htm#method
GW